
Intermediate Project: Welded Bike Trailer
4:51:00 PMFor some time, I've been wanting to make a trailer for my bike to be able to carry groceries and other things in to and from my house. Since I work in the welding shop, I thought this would be a perfect intermediate project for me to (as Dr. Grout says) "practice finishing a project" before the final project. While I was researching designs, I found a really great example on instructables of what I am hoping to accomplish (http://www.instructables.com/id/Welded-bike-trailer/). I do plan to make some alterations to this design. For example, I want to trailer to be easily removed from the bike since I use my bike on a regular basis for purposes other than grocery shopping and I don't want to have to spend a lot of time putting it on and off each time. To solve this problem, I plan to attach the trailer to the bar beneath the seat. This will also cause the trailer to affect the alignment of the wheels less.
 |
| Example on Instructables |

2/20/15: Next, I welded the pieces together! I cut a drop out in the frame where each wheel will connect so that I could get the wheels in and adjust them. My use of recycled materials made the welding a bit more challenging since the edges were not always flush against each other, but I am confident that I was able to get a strong enough weld despite the imperfection.
 |
| The completed welded frame with me holding the wheel up where it will eventually go to make sure it will fit. |
 |
| One of the corners welded. |
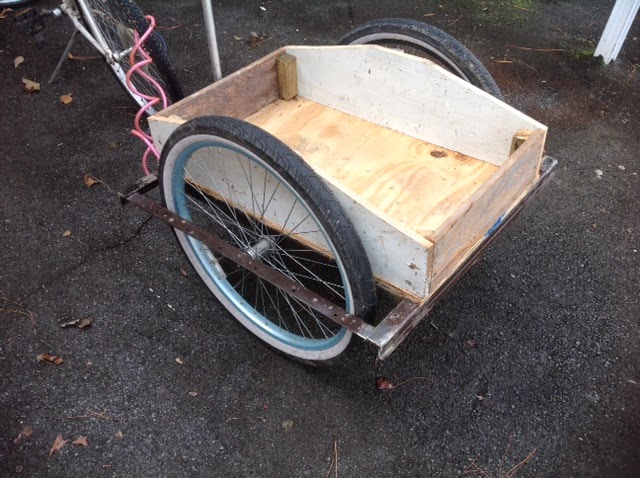
3/4/15: The bike trailer is now functional! I had my presentation of the project today in class. A few updates on what I have done since the last post. First, I attached the wheels. Next, I welded on the metal conduit to attach the trailer to the bike and finished the hitch system that allows the trailer to turn easily while being easily attached and removed from any bike. The last big step was completing the wooden interior that allows things to be carried in the trailer without interfering with the wheels. It is very strong! I tried it out today carrying my husband, Jack, in the back and it didn't seem to have any issues at all. I am very pleased with the outcome. I would still like to paint it to make the steel and wood last longer (and look better)! See photos and a video of the final result below.
 |
| The completed trailer |


0 comments